 Creating fantasies of using manipulation of images is a certain satisfaction for the designers . In addition, the manipulation of photographs makes designers think freely outside the customs and graphic standards that fetter the creative imagination of the designers of space.
In this tutorial, I tried to adapt the effect of smoke (smoke) on a piece of facial images using Adobe Photoshop. Yup, we went straight to the steps of manufacture.
Rabu, 28 April 2010
PHOTO MANIPULATION with Photoshop: Smoke Effect

STEP TWO:

Insert a picture, as the example I used a picture Bunga Citra Lestari. Images can be found linked above.Or a good thing when using the image itself.

STEP FOUR:

Make a selection based on the form object was created with the pen tool. The trick, right-click (in a state pen tool active) and select Make Selection. After that, the menu bar, select select> inverse (Ctrl + Alt + I) for selecting the reverse of the current selection.Then click the layer Bunga Citra Lestari (BCL) and press the Delete key on the keyboard.
STEP FIVE:
 Create a new layer then select the Brushes tool (B). See the picture below to take the smoke of brush that can be downloaded at the link above.
 STEP SIX:

Make sure your foreground color is white photoshop, and select the appropriate smoke brushes and then place it as shown in the picture below.
STEP SEVEN:
 We want to load the selection of this brush to do the cutting on the picture BCL. Therefore, instead of brushes to the basic brush and then brush on a blank section in the middle of this smoke brushes (still in the same layer).
 STEP EIGHT:

Load selection of brushes that have been made. The trick, as he hold the Ctrl key on the keyboard, click on the layer thumbnail in the Brushes palette layer. After the selection is formed, the layer can be removed or brushes in hide (hide) because they are no longer needed.
STEP NINE:
 On the menu bar, select select> Inverse (Ctrl + Alt + I) and press the delete button on the keyboard. The result will be like the image below.
 STEP TEN:
 Create a new layer, select Brushes Tool (B), then place some fruit smoke brushes as shown below.
Step Twelve:

Click the top layer, then click on the icon Create new fill or adjustment layer at the bottom of the layer palette and select Levels. Set the value at the level as seen in the figure below.
Step Thirteen:

Create a new layer, set its blend mode to color and then select the brush tool (B) and brush the color blue in the picture (see the section that was swept by a blue color in the Layer Palette)
STEP FOURTEEN:

Click on the BCL layer and click on the Add Vector Mask icons at the bottom layer palette. Pastikan warna forground adalah hitam . Make sure the forground color is black. After that, use the Brushes tool to spruce up the face that is connected to the smoke (smoke brushes). This is done to create a unified face to the smoke.
STEP LIMABELAS:

Click on the BCL layer and click on the Add Vector Mask icons at the bottom layer palette. Pastikan warna forground adalah hitam . Make sure the forground color is black. After that, use the Brushes tool to spruce up the face that is connected to the smoke (smoke brushes). This is done to create a unified face to the smoke.
STEP FIFTEEN:


Lakukan hal yang sama seperti pada step empat belas terhadap layer smoke brushes untuk menghapus/merapikan bagian ujung dari asap. Do the same thing as in step fourteen of the smoke layer brushes to remove / trim the end of the smoke.
We've finished up on this step, staying apply some text for the final finishing.
Rabu, 31 Maret 2010
Lighting and glowing in Photoshop

Blending effect is one of the interesting functions to create various extraordinary works on photoshop. However, in order to maximize the function, of course, we must know the basic workings of the blending modes. In this tutorial, we will learn by practice, on how to apply blending to create a glowing and lighting effects in Photoshop.

STEP TWO:

Use the Gradient Tool (G), then drag from the center toward the edge of the work area to create a radial gradient in the background.
STEP THREE:

Create a new layer above the background layer, name the layer with 'Smoke'. Render > Cloud untuk membuat layer 'Asap' dipenuhi dengan asap.">Then in the Menu Bar, select Effect> Render> Cloud to make a layer 'Smoke' is filled with smoke. Change the Blending mode to Overlay in the layers palette.
STEP FOUR:

Create a layer above the layer 'Smoke', 'Give the name of the layer with' Colors' and set its blending mode to Color. Then select the Brush Tool (B) Adjust the big brush as shown below and set your foreground color to the color pink photoshop and brush left at bottom of workspace. then change again with a blue foreground color and brush on the right side below the work area, last, continue with the green color of the top work area. So we'll get a dye cloud of fine division with three colors.

STEP SIX:

Click the New Group icon on the layers palette to create a new group, then change the blending mode of the group to Color Dodge. Drag the text layer 'desainstudio' towards the group to present a text layer into the group, then change the blending mode is also a text layer to color dodge
STEP SEVEN:


Double click (text next to it) layer 'desainstudio' to open the blending option window, and select blemish on the Outer Glow and set the value on each item in the outer glow like the picture below.
Outer Glow is one of the functions to make light (glow) that surround the object as shown below.
STEP EIGHT:

Create a new layer, then select the brush tool and brush on the edge of the work area as shown below.
STEP NINE:


Rotation of brush position and position it as shown below, and set the layer blending mode to Overlay brush.
STEP TEN:


Click and drag the brush effects on it while pressing the Alt key on the keyboard, this thing we do to copy a Brush into several pieces. Arrange the brush-brush on both random text position and size.
STEP ELEVEN:

Create a Group and a screen again, Give the name of the star layer and then drag the layer to star in Group 2 (Same as in step six). In the star layer, select the brush tool (B) and then brush some point in the text as shown below. If it is, change the blend mode to Color Group Star and dodge.
STEP TWELVE
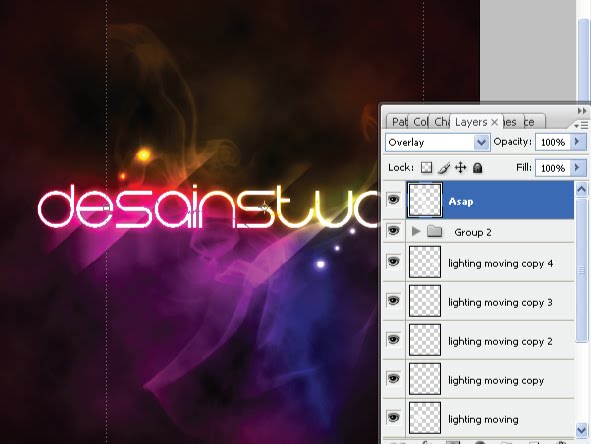
Add a layer again, and change the blending mode of this layer to Overlay. In this layer, brush provide smoke (smoke) in the layer as shown below. Smoke Brushes can be found here.

Langganan:
Postingan (Atom)